How to Paint a Garage Door: A Complete Guide to Prep, Paint, and a Finish That Lasts
How to paint a garage door the right way. Material-specific prep, primer selection, brush vs roller vs sprayer, color and heat warnings, and how long it lasts.
The Garage Guide
Updated Mar 2026 · 14 min read
TL;DR
Painting a garage door is a full weekend project, not an afternoon one. The prep takes longer than the painting. You need 100% acrylic exterior paint matched to your door material (steel, aluminum, wood, or fiberglass), a rust-inhibiting primer if there is any bare metal, and a temperature window of 50 to 85 degrees Fahrenheit with no rain in the 24-hour forecast. Expect 1 coat of primer and 2 coats of paint with full drying time between each. Done correctly, a painted garage door lasts 5 to 7 years on a south-facing exposure and 8 to 10 years on a north-facing one.
Your garage door takes up more visual real estate on the front of your home than almost anything else. When the paint is faded, chipped, or peeling, it is not just the door that looks bad. It is the whole house. When the paint is fresh, clean, and the right color, the entire front elevation looks intentional.
The good news is that painting a garage door is one of the highest-return weekend projects you can do. A gallon of quality exterior paint costs $40 to $60. A quart of primer is $15 to $25. The whole job, done right, costs $75 to $150 in materials and gives you 5 to 10 years of curb appeal before you need to do it again.
The bad news is that most DIY garage door paint jobs fail early, not because of the paint, but because of the prep. Surface contamination, wrong primer, bad weather timing, or too-thick coats cause peeling within months on a job that should last years. This guide walks through all of it in the right order, starting with the decisions that determine the outcome before a brush touches the door.
Step 1: Know Your Door Material
The single most important decision in this project is matching your approach to your door material. Steel, aluminum, wood, and fiberglass all behave differently, need different primers, and accept paint differently. Skipping this step and grabbing whatever primer is on sale causes adhesion failure.
How to identify your door material: Check the sticker on the inside face of the door. Most doors have a manufacturer label that lists the material. If the label is gone, tap the door. Steel sounds solid and dense, aluminum sounds lighter and slightly hollow, wood sounds definitively wooden, and fiberglass can sound similar to steel but feels lighter.
| Door Material | Paint Type | Primer Required | Special Notes |
|---|---|---|---|
| Steel | 100% acrylic exterior latex | Rust-inhibiting primer on bare or rusted spots | Most common door type. Sand glossy surfaces before priming |
| Aluminum | 100% acrylic exterior latex | Bonding primer required (acrylic does not adhere to bare aluminum) | Never skip primer on aluminum (paint will peel within weeks) |
| Wood | 100% acrylic exterior latex or oil-based | Stain-blocking primer if wood has tannin bleed or dark staining | Check for rot before painting (paint will not fix structural damage) |
| Fiberglass | 100% acrylic exterior latex | Bonding primer or manufacturer-specified primer | Avoid oil-based paint on fiberglass (it can cause surface cracking over time) |
Galvanized steel exception: If your door is galvanized (shiny, zinc-coated raw steel), standard primer and paint will not bond to the surface properly. Either use a specific galvanized metal primer or apply an etching primer first. Painting over galvanized metal without the right primer results in peeling within weeks regardless of paint quality.
Step 2: The Surface Test: Is Your Existing Paint Sound?
Critical First Test
Before buying a drop of paint, do this test. Press a piece of painter's tape firmly against the existing painted surface and pull it off sharply. If paint comes up on the tape, the existing coat has failed its bond with the door and must be removed before repainting. Painting over a failing surface buries the problem for 6 to 8 weeks before the new coat fails the same way. If the tape pulls clean, the existing surface is sound and you can paint over it after washing and light sanding.
If the existing paint passes the tape test: The surface is sound. Clean it, scuff it lightly with 150-grit sandpaper to create adhesion, wash off the dust, and you can apply new paint directly (primer is optional if you are not changing color dramatically).
If the existing paint fails the tape test: You must remove the failing paint before proceeding. Options by severity:
- Light peeling: 80 to 120-grit sandpaper or a paint scraper. Sand until all loose paint is removed and edges are feathered smooth.
- Moderate peeling across multiple panels: Chemical paint stripper applied per the manufacturer instructions, then neutralized and rinsed completely.
- Severe or widespread failure: Consider whether the door is a good candidate for painting at all. A door with widespread adhesion failure may have underlying surface damage (rust, rot, or delamination) that paint will not solve.
Step 3: Pick the Right Weather Window
Paint applied outside the correct temperature and humidity window fails regardless of quality. This is the mistake most often made on a project that works around a homeowner's schedule instead of around the forecast.
The correct conditions:
- Temperature: 50 to 85 degrees Fahrenheit during application and for at least 24 hours after
- Humidity: Below 70 percent
- No rain in the 24-hour forecast before or after painting
- No direct sunlight hitting the door surface while you are painting
Why each condition matters:
Below 50 degrees, latex paint thickens, brush marks stay visible, and the paint film does not form correctly, resulting in a brittle finish that peels in the first freeze-thaw cycle.
Above 85 degrees, the paint surface skins over before the underlying layer cures, trapping moisture and solvents that cause bubbling and peeling. Direct sunlight on the door surface while painting causes the same problem even at lower air temperatures.
High humidity prevents proper evaporation of water from latex paint, extending dry time unpredictably and increasing the risk of sagging, runs, and adhesion failure.
The ideal scenario: An overcast morning in spring or fall, temperatures in the 60s, with a dry 48-hour window. If you cannot hit this window, reschedule. Weather-related paint failures cannot be fixed without stripping and repainting.
Step 4: Gather Materials
| Item | Specification | Cost |
|---|---|---|
| Exterior acrylic paint | 100% acrylic, semi-gloss or gloss finish | $40 to $60 per gallon |
| Primer | Rust-inhibiting for steel; bonding primer for aluminum and fiberglass | $15 to $25 per quart |
| Sandpaper | 80-grit (heavy sanding), 150-grit (scuffing), 220-grit (final smoothing) | $8 to $15 |
| TSP cleaner or degreaser | Removes grease, exhaust residue, and chalk | $8 to $12 |
| Painter's tape | 1.5-inch, exterior grade | $6 to $10 |
| Drop cloth | Canvas or plastic, for floor and driveway | $10 to $20 |
| Brush (2 to 2.5 inch angled sash) | Nylon/polyester for latex paint | $8 to $15 |
| Foam roller (3/8-inch nap) | For flat panel areas | $5 to $10 |
| Wire brush | For rust removal on steel doors | $5 to $8 |
| Rust-inhibiting spot primer | For bare metal or rusted areas only | $10 to $15 |
Total materials cost: $75 to $150 for a standard two-car garage door, assuming one coat of primer and two coats of paint.
How much paint do you need: A standard 8x7-foot single garage door requires approximately 1 quart of paint per coat. A 16x7-foot double door requires approximately 1 gallon per coat. Buy slightly more than calculated. Running short during a coat and introducing a new can mid-panel creates visible lap lines.
Step 5: Prep the Surface
Prep determines how long the paint lasts. A paint job over a clean, properly sanded, fully dry surface lasts 5 to 10 years. The same paint over an improperly prepared surface may last 6 months. Take the time here.
Clean the Door
Mix 1/4 cup of TSP cleaner (trisodium phosphate) with 1 gallon of warm water. For mildew stains, substitute a solution of 1 part bleach to 4 parts water. Wash the entire door surface with a soft brush or sponge, getting into all panel recesses and edges. Rinse thoroughly with clean water and allow to dry completely, at minimum 24 hours in dry weather, longer in high humidity.
Do not use a pressure washer directly on the door surface. Pressure washing can drive water behind panels, damage weatherstripping, and chip existing paint. Use a garden hose with a standard nozzle for rinsing.
Remove Rust (Steel Doors)
Any rust must be addressed before priming. Use a wire brush to remove loose rust down to clean metal. Feather the edges of the sound paint surrounding the rust spot with 80-grit sandpaper until there is no ridge between bare metal and existing paint. Apply a rust-inhibiting spot primer to all bare metal areas. Allow to dry fully before applying full-surface primer.
Sand the Surface
Lightly sand the entire door surface with 150-grit sandpaper. The goal is not to remove paint. It is to dull the existing finish so the new paint has something to grip. Pay particular attention to any glossy sections where the original finish is intact. A glossy surface has almost no mechanical adhesion. New paint applied over a gloss finish without sanding tends to peel in sheets.
After sanding, wipe the surface with a tack cloth or damp rag to remove all dust. Allow to dry before priming.
Tape and Protect
Apply painter's tape to all hardware, hinges, windows (if any), and the door frame perimeter. Lay a drop cloth on the driveway and ground beneath the door. Disconnect the garage door opener by pulling the red emergency release cord so you can move the door manually to different positions while painting.
Step 6: Apply Primer
Primer is not optional for bare metal, aluminum, fiberglass, or any surface with repaired spots. It is the foundation that the finish coat bonds to. Skipping it on these surfaces is the most reliable way to cause premature peeling.
Apply primer starting at the top panel and working down. Use a 2-inch angled brush to cut in around panel edges and recesses. Fill panel centers with a 3/8-inch foam roller. Keep a wet edge at all times. Primer that dries before you blend the adjacent section creates visible ridges.
Allow primer to dry for the full time specified on the label, typically 2 to 4 hours for fast-dry primers, 12 hours for standard. Do not rush this. Painting over undercured primer traps solvents and causes adhesion failure.
One coat of primer is sufficient for most surfaces. Two coats may be needed if you are covering bare metal that was heavily rusted, or if the new color is dramatically lighter than the existing surface.
Step 7: Paint Application: Brush, Roller, or Sprayer?
Each application method has a place in this project. The best result comes from combining two of them, not choosing one.
Brush Only
Best for: Doors with heavy panel detail, recesses, and molding. Gives the most control. Slowest method. Higher risk of brush marks if paint is too thick or technique is inconsistent.
To avoid brush marks: Use a high-quality nylon/polyester brush. Thin the paint slightly with water (no more than 10 percent by volume for latex). Apply in long, smooth strokes in one direction. Never go back over a section that has begun to dry.
Roller Only
Best for: Flat or low-profile doors. Significantly faster than brush. Leaves a slight orange-peel texture that is typical for exterior surfaces and actually aids durability by providing more surface area.
3/8-inch nap is the correct roller cover for most garage door surfaces. Thicker nap leaves too much texture. Thinner nap does not hold enough paint for adequate coverage.
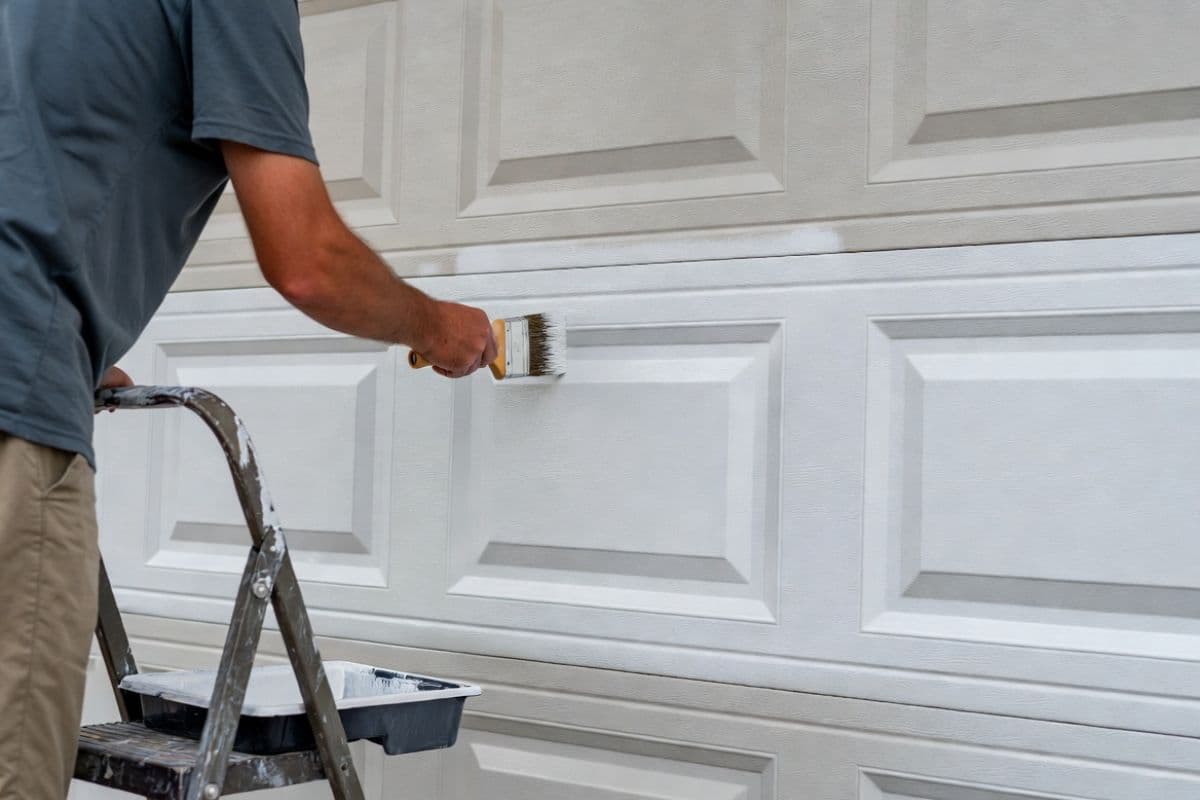
Brush and Roller Combined (Recommended)
Use a brush to cut in all recessed panel areas, edges, and trim. Immediately follow with a roller on all flat panel surfaces. The roller smooths out brush marks from the cut-in work and produces a consistent finish across the full panel. This is the method professionals use.
Sprayer
Best for: A perfectly smooth finish on flat or low-profile doors. Produces the most professional result. Requires the most prep (masking everything within spray drift range, 6 to 10 feet in all directions), the most experience, and the most cleanup. A sprayer in the hands of someone unfamiliar with technique produces runs, uneven coverage, and overspray on the driveway and siding.
If you want to use a sprayer: Apply two thin passes rather than one heavy one. Keep the sprayer moving at all times. Never stop moving while spraying. Pausing with the trigger held produces runs instantly.
Step 8: Apply Two Coats
First Coat
Start at the top panel and work down. Paint all recessed areas first with the brush, then roll or brush the flat surfaces. Work one panel at a time, keeping a wet edge between panels to avoid lap marks.
Allow the first coat to dry completely before applying the second. Latex exterior paint typically requires 2 to 4 hours of dry time between coats at 70 degrees Fahrenheit. In cooler temperatures or higher humidity, add 50 to 100 percent to that estimate.
Do not assess coverage after the first coat. Latex paint looks patchy and uneven when wet. It looks different, often significantly better, when fully dry. Wait until the first coat is dry before deciding whether a second coat is needed.
Second Coat
Apply in the same order and technique as the first coat. The second coat is what delivers the final color depth, gloss level, and durability. Do not skip it. A single coat of exterior paint, even a thick one, does not provide adequate UV protection or water resistance on an exterior surface that gets daily weather exposure.
Remove painter's tape while the second coat is still slightly tacky (not fully wet, not fully dry). Removing tape from fully dry paint pulls paint edges and leaves ragged lines. The ideal time is 30 to 60 minutes after the final coat.
The Color and Heat Warning
Heat Warning for Dark Colors
If your garage door faces south or west and receives direct afternoon sun, dark colors (black, dark navy, hunter green, dark brown) cause significant heat buildup on metal doors. Surface temperatures on a dark south-facing steel door can reach 150 to 160 degrees Fahrenheit on a 90-degree summer day. This level of heat causes panel warping, paint breakdown, and in some cases voids the manufacturer warranty on the door itself. Some manufacturers will not honor warranty claims on doors painted dark colors in high-sun exposures. If you want a dark color on a south or west-facing door, use a paint specifically rated for high solar reflectance, and confirm with your door manufacturer that it does not affect your warranty.
Safe color choices for south-facing doors: White, off-white, light gray, beige, light sage, and similar light tones with Light Reflective Values (LRV) above 50.
Direction check: Stand in your driveway facing the garage door. Use your phone's compass. If you are facing north (the door faces south), be cautious with dark colors. If you are facing south (the door faces north), you have full latitude on color choices. North-facing doors get limited direct sun and handle dark colors without issue.
How Long Does Garage Door Paint Last?
Paint longevity depends primarily on sun exposure and surface prep quality. A correctly prepped door with quality 100% acrylic exterior paint lasts:
| Door Orientation | Expected Paint Life |
|---|---|
| North-facing (minimal sun) | 8 to 10 years |
| East-facing (morning sun only) | 7 to 9 years |
| West-facing (afternoon sun) | 5 to 7 years |
| South-facing (full sun) | 4 to 6 years |
Signs it is time to repaint:
- Visible fading or chalking (a chalky residue that comes off on your hand when you touch the door)
- Peeling or flaking in any area
- Bare metal or wood visible anywhere
- The color looks significantly different from the house trim or body
Touch-up between full repaints: Small chips and scratches can be touched up with a small brush using the original paint color. Touch up within the first year catches damage before moisture gets under the paint film and causes the chip to spread. For more on keeping your door in top shape between repaints, see the garage door maintenance checklist.
Frequently Asked Questions
What is the best paint for a garage door?
100% acrylic exterior latex paint in a semi-gloss or gloss finish is the best choice for any garage door material. Semi-gloss is more forgiving of surface imperfections and easier to apply without lap marks. Gloss provides maximum durability and UV resistance and cleans up more easily. Avoid flat or eggshell finishes. They do not shed water or resist dirt effectively on an exterior surface that faces weather and exhaust daily.
Do I need to prime a garage door before painting?
Yes, in most cases. Primer is required for bare metal, aluminum, fiberglass, and any area where existing paint has been removed down to the substrate. It is optional if the existing paint is in sound condition, not changing color dramatically, and passes the tape test. Never skip primer on aluminum or fiberglass. Latex paint applied directly to these materials without a bonding primer will peel within weeks regardless of quality.
How do I paint a garage door without brush marks?
Use a 3/8-inch foam roller on flat panel surfaces and a quality nylon/polyester brush for panel edges and recesses. Apply thin coats. Thick coats are the primary cause of brush marks and runs. Thin latex paint slightly with water (no more than 10 percent) if brush marks persist. Work in the shade or on an overcast day. Heat and direct sun cause paint to skin over before you can brush it out. Never go back over a section that has started to dry.
Can I paint a garage door without removing it?
Yes. Disconnect the opener by pulling the red emergency release cord and move the door manually to different positions as needed to access different sections. Painting with the door in place is standard practice. The only reason to remove a door for painting is if you are using a spray booth for a showroom-quality finish.
How long does it take to paint a garage door?
A single-car door (8x7 feet) takes 4 to 6 hours total across two days (one for prep and priming, one for two coats of paint with dry time in between). A double door (16x7 feet) takes 6 to 8 hours across the same two-day window. Rushing the project into a single day by shortcutting dry times between coats is the most reliable way to cause peeling.
Should I paint my garage door with a brush or roller?
Use both. A 2-inch angled brush for panel recesses and edges, followed immediately by a 3/8-inch foam roller on the flat panel surfaces. The roller smooths out brush marks left by the cut-in work and produces a consistent finish across the full panel. This combination produces better results than either tool alone and is the technique professional painters use on paneled garage doors.
How much does it cost to paint a garage door?
DIY materials for a single-car garage door run $75 to $100. A double door runs $100 to $150. Hiring a professional painter costs $200 to $500 for a standard door depending on condition and location. The professional cost is worth considering if the door has significant peeling, rust, or surface damage that requires extensive prep. That prep work is where most DIY jobs go wrong. If the door is too far gone for paint, see the garage door replacement cost guide for a full breakdown.
What happens if I paint a garage door in cold weather?
Latex paint applied below 50 degrees Fahrenheit does not form a proper film. The paint thickens, brush and roller marks remain visible in the dried surface, and the finish becomes brittle and prone to cracking in the first freeze-thaw cycle of winter. Paint applied in cold weather often peels within the first season. If your project window falls below 50 degrees, reschedule for spring. For more on protecting your garage through cold months, see how to winterize your garage.
Related Guides
Garage Door Maintenance
Annual maintenance that extends the life of the surface you just painted.
ReviewBest Garage Door Openers
If you are updating the exterior, the opener is the next upgrade.
Cost GuideGarage Door Replacement Cost
When painting is not enough and replacement makes more sense.
GuideHow to Winterize Your Garage
Protect the paint job through winter with proper sealing.
ProblemGarage Door Won't Open
If the door is having problems beyond cosmetics.
Glossary
Acrylic latex paint
A water-based exterior paint formulated with 100% acrylic resins. The best choice for garage doors of any material. Acrylic latex adheres well to properly prepared surfaces, resists UV degradation, remains flexible through temperature swings (preventing cracking), and cleans up with water. Always specify 100% acrylic rather than vinyl acrylic or acrylic blend for exterior use.
Bonding primer
A primer formulated to adhere to low-porosity, difficult-to-bond surfaces including aluminum, fiberglass, galvanized metal, and glossy existing paint. Standard primer does not adhere reliably to these surfaces. Bonding primer is required on aluminum and fiberglass garage doors before any topcoat. Skipping it causes peeling within weeks.
Rust-inhibiting primer
A primer formulated for bare or rusted steel that contains rust-inhibiting additives (commonly zinc chromate or zinc phosphate) that slow the progression of oxidation under the paint film. Required on any bare steel or rusted spots before topcoat application. Apply it only to bare or rusted areas, not as a full-surface primer on already-painted steel.
TSP (trisodium phosphate)
A heavy-duty degreasing cleaner used to prepare exterior surfaces before painting. Removes grease, oil, exhaust residue, chalk, and mildew from garage door surfaces. Available at hardware stores in powder form ($8 to $12). Mix 1/4 cup per gallon of warm water. Always rinse thoroughly after TSP cleaning. Residual TSP interferes with paint adhesion.
Chalk
The powdery white residue that forms on the surface of aged exterior paint as UV radiation breaks down the paint binder. A chalky surface must be cleaned before repainting. New paint applied over chalk bonds to the chalk, not the door, and peels when the chalk layer releases. Test for chalk by rubbing your hand across the door surface.
Light Reflective Value (LRV)
A scale from 0 (black, absorbs all light) to 100 (white, reflects all light) that measures how much light a paint color reflects. Relevant for south and west-facing garage doors because low-LRV colors (below 25) cause significant heat buildup on metal doors. For south-facing metal doors, choose colors with LRV above 50 to minimize heat-related warping and paint degradation.
Semi-gloss finish
A paint sheen level between satin and gloss. The recommended finish for garage doors. Semi-gloss provides good UV resistance and water shedding, cleans up easily, and is more forgiving of surface imperfections than full gloss. Flat and eggshell finishes are not appropriate for exterior door surfaces.
Lap mark
A visible line or stripe in a dried paint surface caused by overlapping wet paint onto a section that has partially dried. Prevented by maintaining a wet edge, always overlapping the previous brush or roller stroke while it is still wet. Working in cooler temperatures and avoiding direct sun on the door surface while painting significantly reduces lap mark risk.
EPA Safer Choice
A certification program run by the U.S. Environmental Protection Agency that identifies products with safer chemical ingredients. When selecting paint and primer products, look for the Safer Choice label for formulations with lower volatile organic compound (VOC) levels and reduced environmental impact. Particularly relevant if you are painting with the garage door in the down position in a partially enclosed space.
Get Expert Garage Help
Connect with qualified garage professionals in your area. Free quotes, no obligation.